Friday, 28 October 2011

Free Halloween paper puppet templates

It was my turn to do the craft at playgroup last week and with Halloween fast approaching I did some drawings of Halloween puppets for the kids to colour in. All you have to do is print them off, colour them, cut them out and cello tape a straw to the backs. Rosie has demonstrated the art of colouring and puppet waving.

Phyllis the dancing pumpkin

Barry the Halloween bat

Great demonstrating Rosie


So happy colouring...just right click and save the images below then print them out...


Barry the Halloween bat


Phyllis the dancing pumpkin


Happy Halloween.
Jennie

3D Kiddie art

Since our Melbourne trip, Rosie's been doing some serious crayoning and I've had a play with mounting her art onto small boxes, like the letterhead exhibition. I also found an Alphabet letter stamp set I've been looking for and added a few words to her masterpieces.  Check out the results...

artwork and boxes to cover

My new stamp set
A few words added to the artworks

Art arranged on the wall

They look really cool in groups
 They look cool on the wall.  All you need to do is wrap the boxes in artwork, like wrapping a present (Try and keep it really neat as you see the sides as well). Then add some spongey double sided tape and arrange then on the wall. I even folded one around a flat piece of card, they don't all have to be 3D. The overall effect of different size and depth boxes looks really effective.  Give it a go with all those A4 sheets of artwork you have. Enjoy creating.

Jennie

Tuesday, 25 October 2011

A little trip to Melbourne

I had a little trip to Melbourne the other week and saw lots of cool stuff but a couple of things I'd like to share with you.

A fabulous exhibition called Paper City on until 31st Oct 2011
http://www.melbourne.vic.gov.au/citygallery/Exhibitions/Documents/PaperCity_Catalogue.pdf
It showcases an archive of historic letterheads. 

I loved the way they displayed the exhibition, mounting them on different size and depths of display and grouping them together.  Check out a few pictures I took.


You could group pictures like this at home, even mount your kids artwork onto different size boxes (boxes could be any cardboard box from the kitchen cupboard) and then group them together.  When Rosie gets a collection of artwork together...I'll get her straight onto that...I'll mount and cover boxes and hang on the wall.  I'll post the results of this idea soon.  Just think of the artistic possibilities with this, maybe an old map cut up or even fabric.

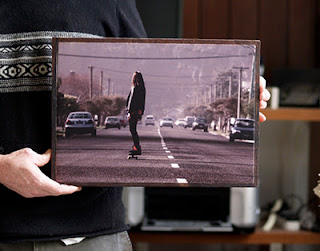
The other cool thing my eyeballs popped out at was panelpop.  They make recycle framed stone panels that you can draw/paint directly onto. They also print your photos or art onto them.  They are very cool and I bought one to paint on.  Watch this space for my result and check out their website and blog.  The shop in Fitzroy had some super cool examples of photo printing.  The look could be very retro/vintage. They deliver worldwide as well.

http://www.panelpop.com/


Pretty cool aren't they. I can't wait to use mine.
Hope you enjoyed my snippets from Melbourne, we all had a great time.

Jennie

Friday, 21 October 2011

The first of many things

This is the first of many blogs, paintings, crafty projects I would like to share with you.  I will find myself seeing and thinking random things that I hope you will enjoy.


I've been busy setting up my Etsy account, hiccup art.....soon to be launched.  I'll let you know in the next week or two.  Take a look at the first few nursery prints I'll have for sale...


Nana's caravan
 

Nana's telephone table

I've taken inspiration from my childhood. I like all things vintage, retro and a little bit twee. I hope you like them.


Jennie